GUIDE
PushSense user guide
Everything the menu bar app can do, one setting at a time. If you only read one section, read First run. New in 0.2: Buddy mode.
Install
- Download the latest dmg.
- Open it and drag PushSense into Applications.
- Open PushSense from Applications. It is signed and notarized by Apple, so there is no “unidentified developer” warning. If you see one anyway, you downloaded it from somewhere other than the link above.
PushSense lives in the menu bar. There is no Dock icon and no main window; the only window you will ever see is the tutorial on first launch.
Requirements: macOS 13 or later, Apple Silicon.
First run
The built-in tutorial walks you through three steps. You can reopen it any time from the menu with Tutorial….
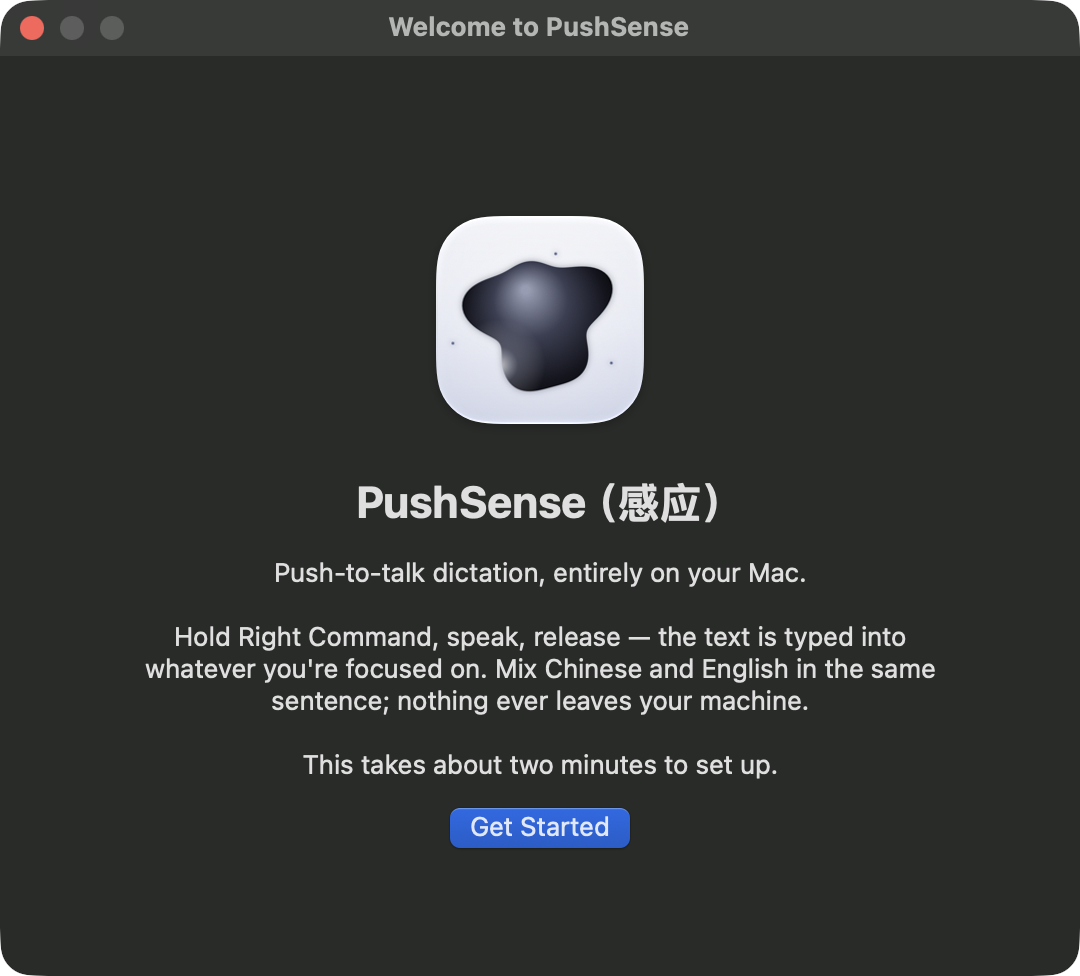
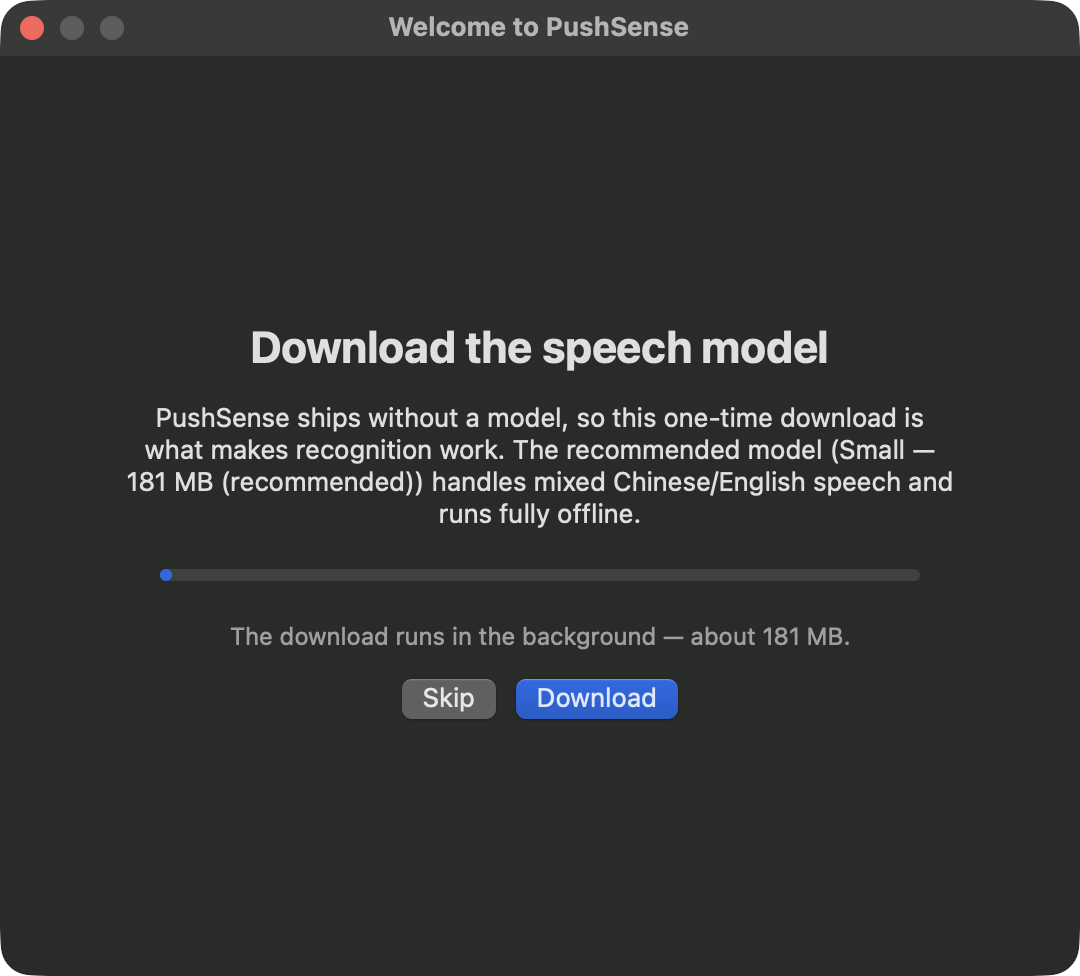
1. Download the speech model. The app does not bundle a model, so the first launch downloads one (Small, 181 MB). This is a one-time download; it goes to Application Support and stays there across updates. The menu shows ”✓ Speech model ready” when it is done.
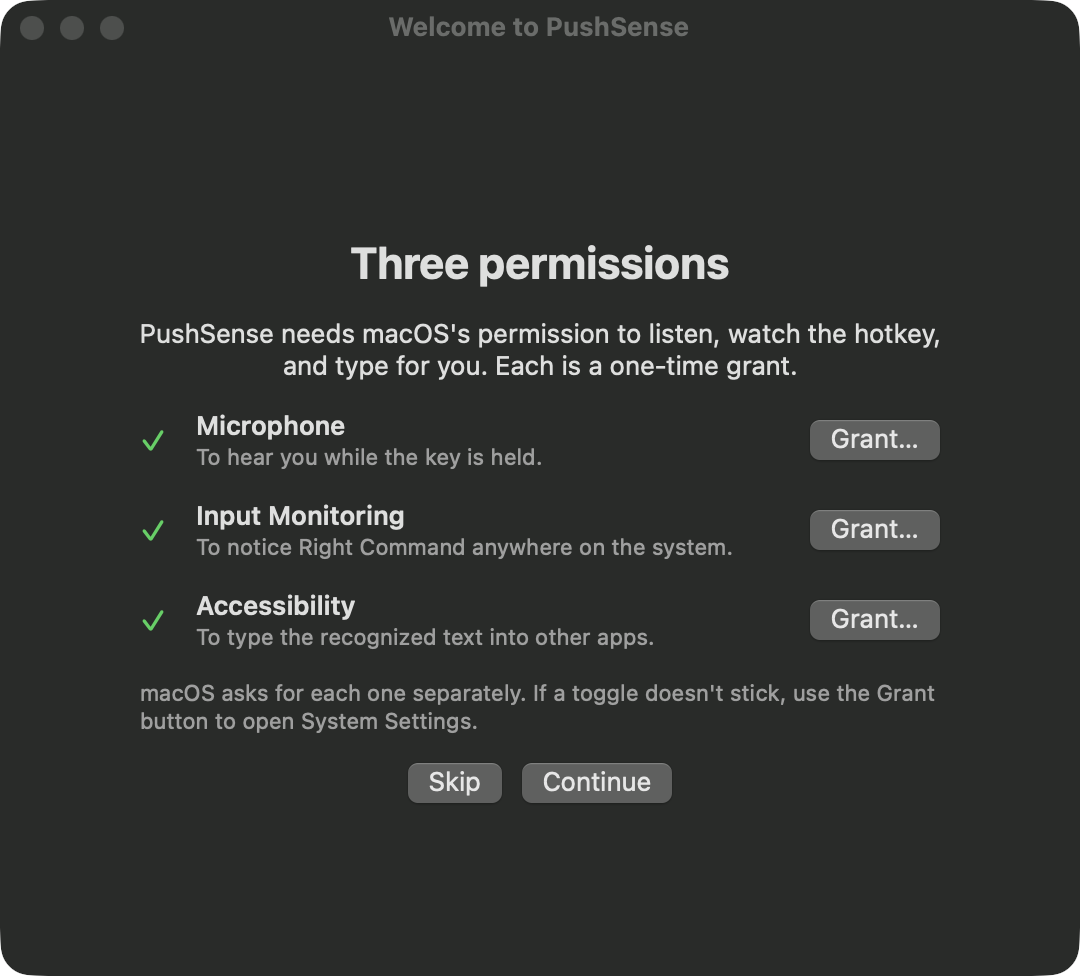
2. Grant three permissions. Each button opens the right pane in System Settings.
| Permission | Why it is needed | Without it |
|---|---|---|
| Microphone | To record while you hold the key | Nothing is recorded |
| Input Monitoring | To notice when you press and release the hotkey | The key does nothing |
| Accessibility | To type the transcript into the app you are using | The halo shows, but no text appears |
Accessibility is the one people miss. If PushSense records but nothing shows up, check that one first.
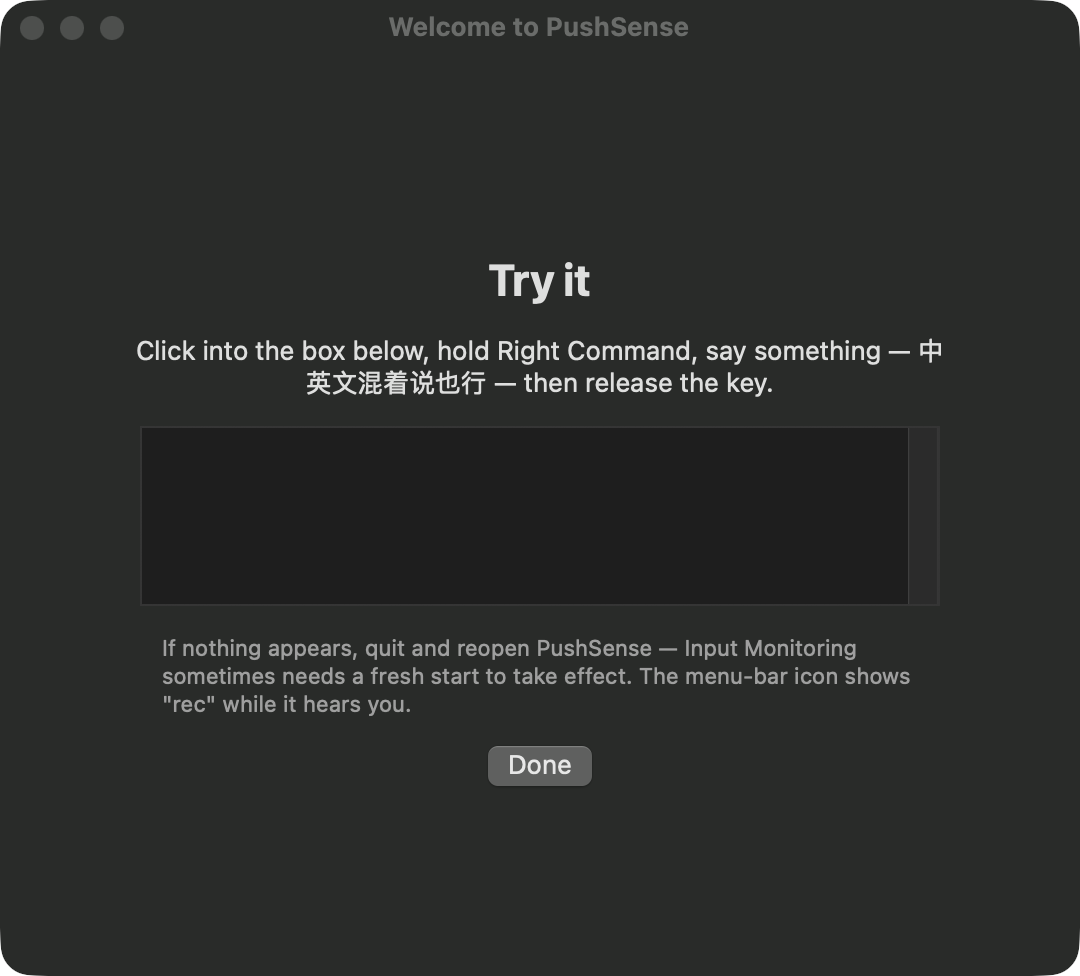
3. Try it. Hold the hotkey, say something, release. The text is typed into whichever field has focus.
Using it
Hold Right Option (the default), speak, release. That is the whole interaction. Since 0.2 there is a second one, Buddy mode: click a pearl on your screen, talk, and drag the words wherever they go. The two coexist; a hotkey take always types into the focused app.
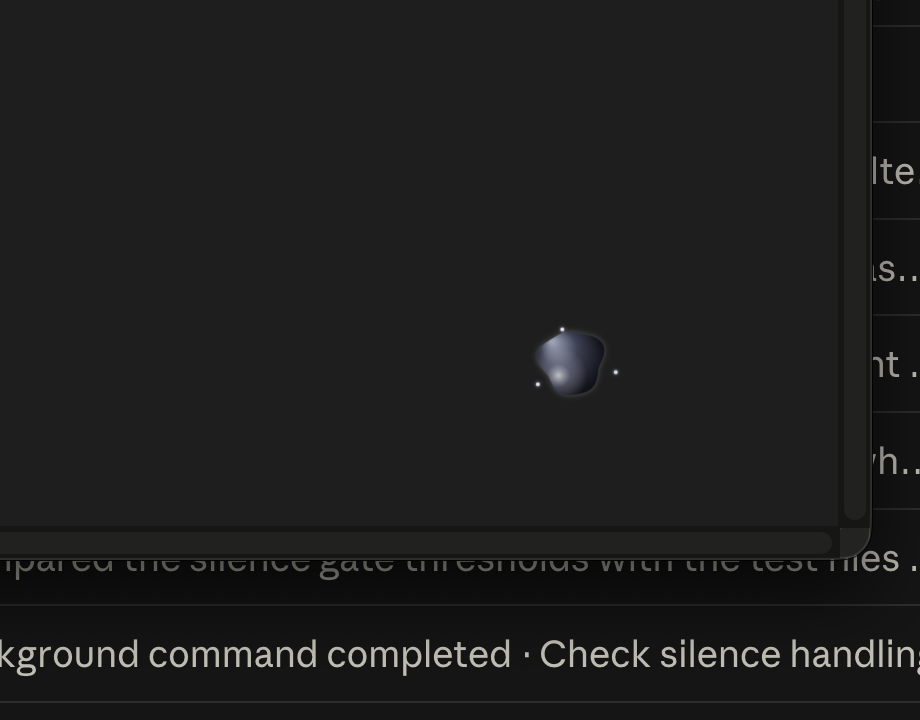
While the key is down a small halo appears near the cursor so you know it is listening. Release the key and the transcript is typed out wherever your cursor already is: a browser, a chat app, a terminal, a text field in any app.
Mixed Chinese and English in the same sentence works without any switch. Chinese comes out as Simplified; Latin text, numbers and emoji pass through untouched.
If you release the key without saying anything, nothing is typed. Silence is discarded on purpose, because Whisper otherwise invents plausible text from near-silent audio.
Recording limit and recovery
Every take has a five-minute maximum, for both the hotkey and Buddy. At the limit PushSense stops recording and starts transcription automatically. Buddy can still stop earlier after silence, or when you click it again.
While recording, PushSense keeps a local WAV recovery file. If recording is interrupted or the transcript cannot be saved, open Recovered audio… from the menu bar to find it. A new take never overwrites an unfinished one. After a successful transcript is saved to local history, its recovery audio is deleted. The last 50 transcripts are kept locally in both hotkey and Buddy modes.
Recovery recordings are stored in
~/Library/Application Support/PushSense/DictationRecovery/. They are ordinary,
unencrypted audio files on your Mac and are never uploaded. Remove retained
files when you no longer need them. If the recovery folder reaches its 200 MiB
budget, recording will not start until you make room; old recordings are not
automatically deleted. Disk or capture failures stop recording and show a warning.
Recovery reduces the risk of losing a take, but cannot guarantee against disk
failure, power loss, or a crash during a write.
Buddy mode
The hotkey assumes you already clicked into the right box before speaking. Buddy mode removes that assumption: say it first, decide where it goes later. It is off by default. Turn it on from the menu bar with Buddy mode (click the orb to talk); after updating to 0.2 the app introduces it once, with a button that turns it on.
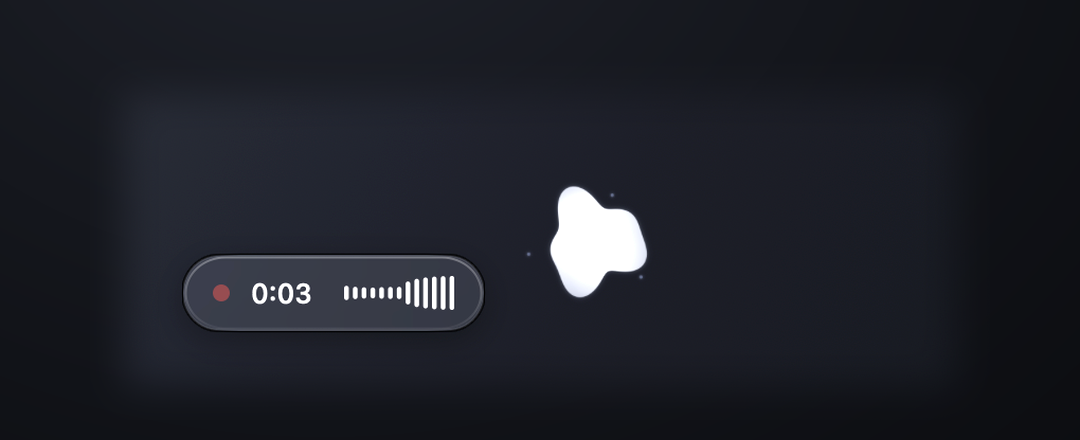
Click the pearl and talk. A small pearl sits in the corner of your screen (drag it anywhere; Move the buddy back to the corner is in the menu if you lose it). Click it and it melts into the orb you know from the halo; a capsule beside it shows a red dot, a timer and your voice. Stop talking for 1.5 seconds and the take ends by itself. Click the pearl during a take to end it early.
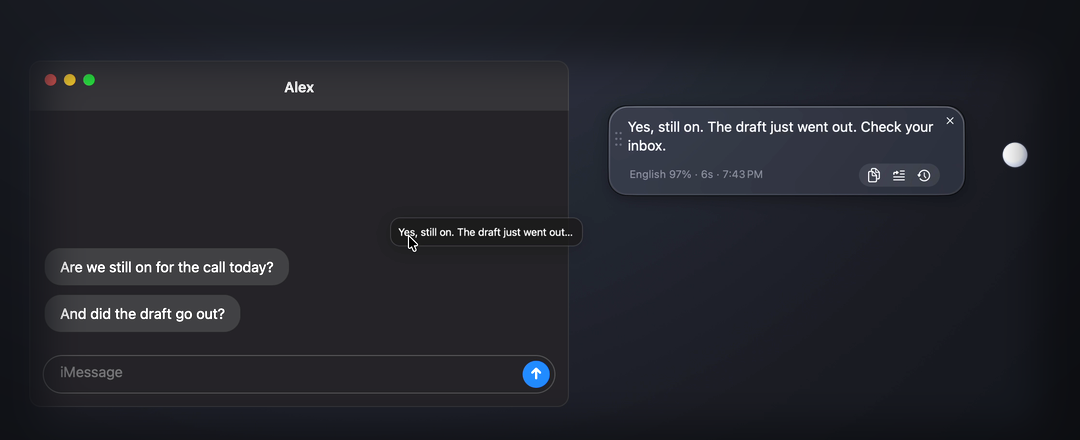
The transcript lands in a glass bubble next to the orb. Nothing is typed for you unless you ask. The text in the bubble is a native drag source: press on it, drag it into any window that takes text (an editor, a chat box, a browser field, Terminal, the Desktop, where it becomes a text clipping) and let go. The words land at the drop point. If a window refuses the drop, PushSense clicks where you released and pastes instead.
Hover the bubble for four buttons: copy, paste into the focused app, history, and close. After 25 seconds of being ignored the bubble folds into a one-line pill; hover to unfold it.
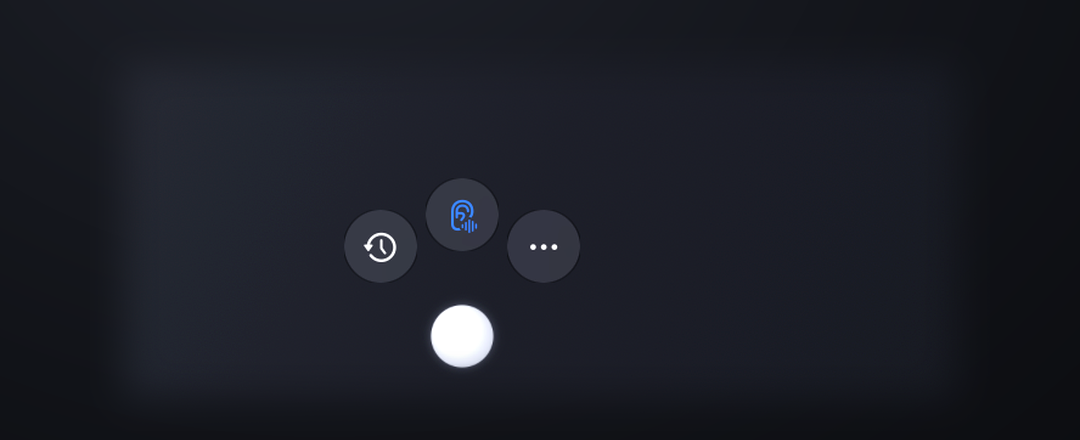
Hover the pearl and three glass buttons fan out over it:
- History: the last 50 takes. Pick one and it is back in the bubble, ready to drag or paste. Right-clicking the pearl opens the same list, and so does History (right-click the buddy) in the menu bar.
- Auto-stop (the ear): on, a take ends after 1.5 s of silence; off, it ends when you click the pearl again. The capsule says which.
- Menu: the menu bar dropdown, without reaching for the menu bar.
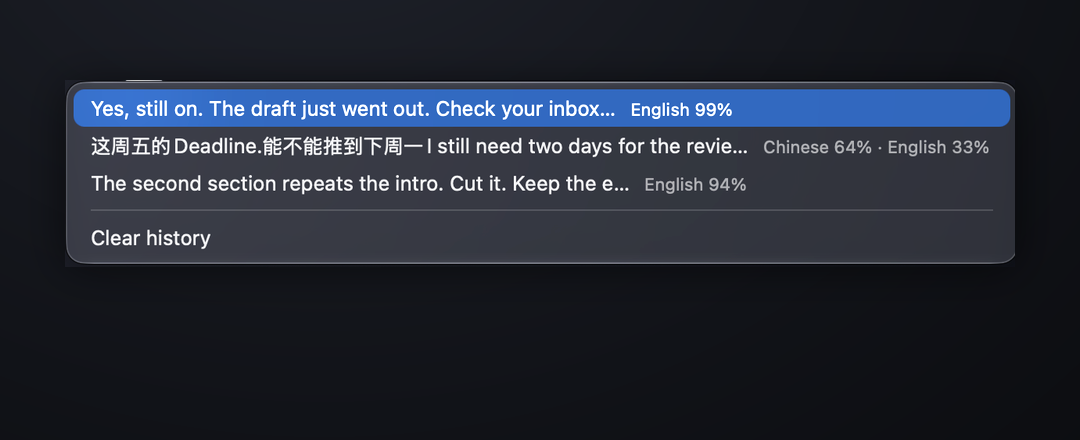
The language mix. Whisper decodes a take with one language token. On a
sentence that mixes two languages it has to pick, and sometimes the whole
sentence comes out in one of them. Rather than pretend it is certain, the
bubble’s meta line and every history row show what the detector heard, for
example English 59% · 中文 39%, leader first. When a mixed sentence comes
out in one language, that line is the reason. Takes made with a fixed
language setting show nothing extra.
A resting pearl is a still image, not an animation, so Buddy mode costs nothing while you are not using it. The bubble, capsule and buttons are Liquid Glass on macOS 26; earlier versions get a frosted panel with the same layout.
Every setting
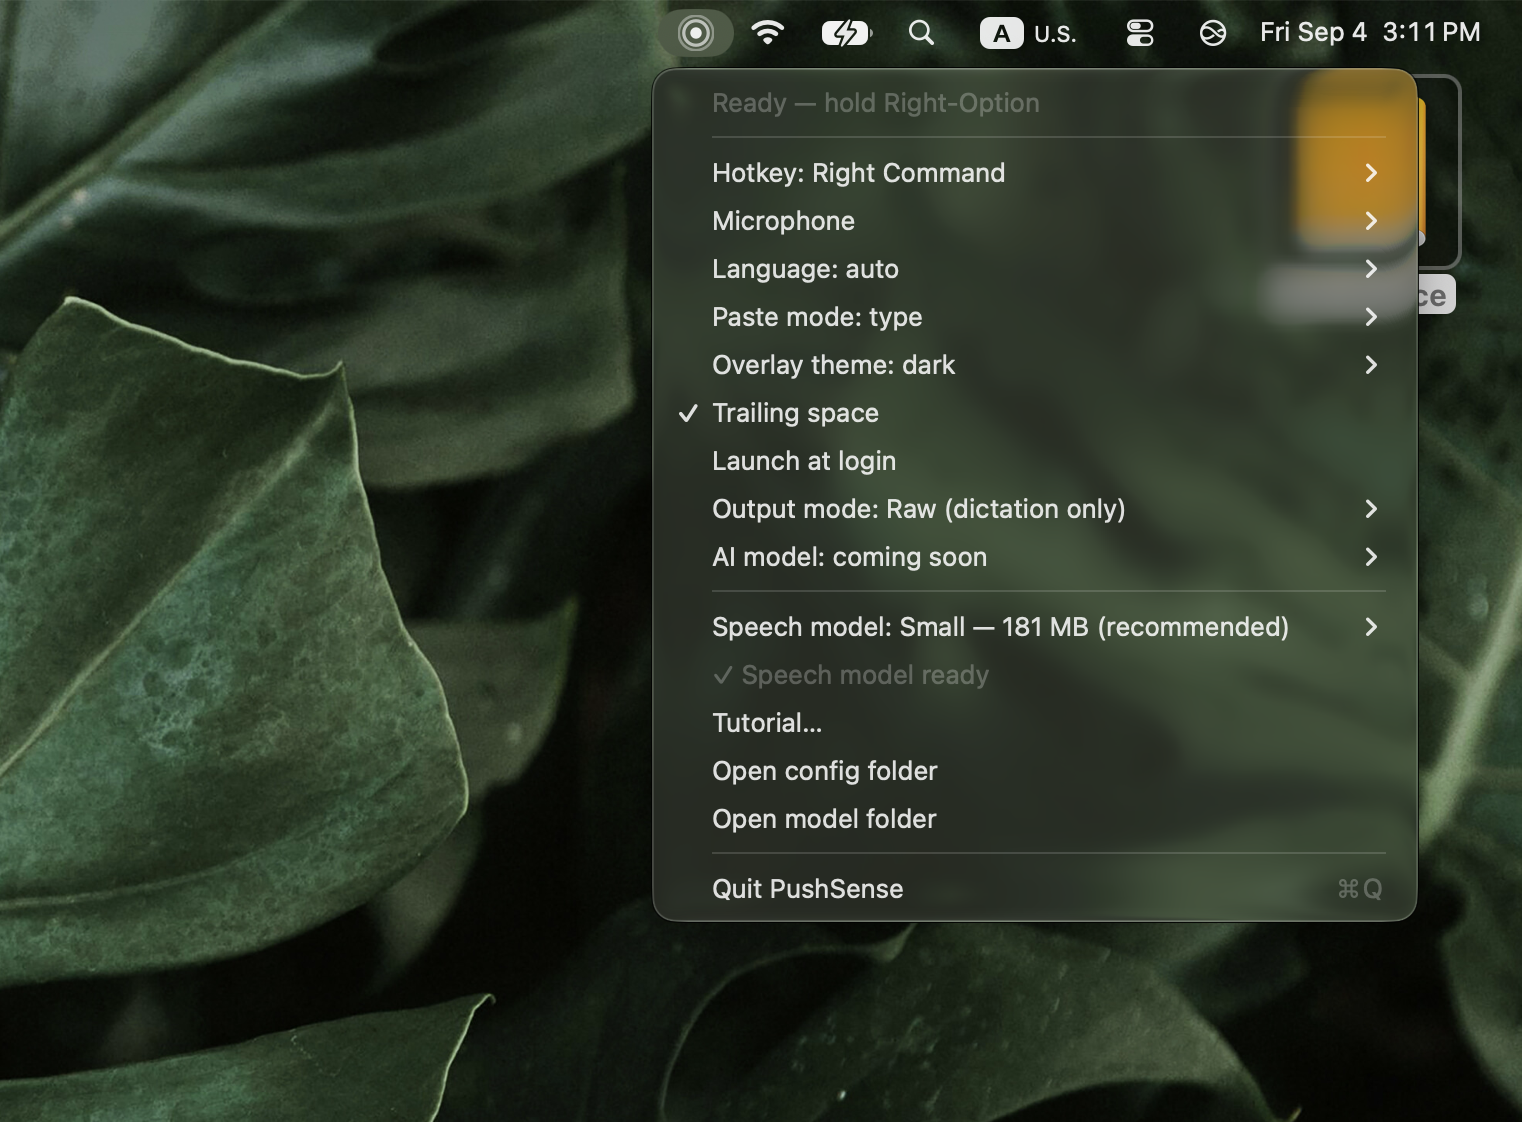
Open the menu by clicking the PushSense icon in the menu bar. The first line shows the current state (“Ready — hold Right Option or click the buddy”, “Listening…”, and so on).
Hotkey
Which key you hold to record. Four choices, all on the right side of the keyboard so they never collide with shortcuts you already use:
- Right Option (default)
- Right Command
- Right Control
- Right Shift
Pick the one your right thumb or pinky lands on naturally. The left-side keys are deliberately not offered.
Microphone
Which input device to record from. System Default follows whatever macOS is using; pick a specific device if you want PushSense to always use, say, an external mic even when your AirPods connect.
Language
What Whisper is told about the audio.
- auto (default): detect the language, including switching mid-sentence. This is the setting that makes mixed Chinese/English work.
- zh: force Chinese. Slightly more accurate if you only ever speak Chinese. English words inside a Chinese sentence are still kept.
- en: force English. Chinese speech gets translated or dropped, so only use this if you never speak Chinese.
Leave it on auto unless you have a reason not to.
How mixed speech is handled. Whisper decodes with one language at a time. Chinese with English words dropped in (“我今天要去 meeting”) is decoded as Chinese and the English survives, on every model. A whole sentence in each language (“Let me check the dashboard first. 然后我们再看 latency 的问题”) is harder: PushSense listens for a short pause, detects the language on each side, and decodes each side on its own. So when you switch languages mid-take, a brief pause at the switch is all it needs. Without the pause, Small keeps only one of the two languages; Large v3 Turbo usually follows the switch anyway.
Paste mode
How the transcript gets into the app you are using.
- type (default): PushSense types the characters directly as Unicode keystrokes. Your clipboard is never touched.
- clipboard: PushSense puts the text on the clipboard and presses ⌘V. Use this if an app rejects typed input (some remote desktop and terminal apps do). The downside is that it overwrites whatever you had copied.
Overlay theme
The look of the halo that appears while recording.
- dark: black pearl, the original.
- light: silver pearl, easier to see on apps that are already dark.
Trailing space
When checked, a space is added after each transcript, so you can dictate several sentences in a row without them running together. Uncheck it if you mostly dictate into search boxes or single fields.
Launch at login
Start PushSense automatically when you log in. Recommended once you have used it for a day; a dictation tool you have to remember to open does not get used.
Buddy mode (click the orb to talk)
Shows or hides the pearl. See Buddy mode. The hotkey works the same whether the pearl is on screen or not.
Buddy output
Where a take that you started by clicking the pearl ends up. Hotkey takes are not affected; they always type into the focused app.
- Keep in bubble (drag or paste) (default): the transcript waits in the bubble for you to drag, copy or paste it.
- Paste into the focused app: behaves like a hotkey take. The bubble still shows the text so you can drag it somewhere else too.
The same submenu holds Stop after silence (the auto-stop switch, also on the pearl’s hover ring) and Move the buddy back to the corner.
History (right-click the buddy)
The last 50 takes from either gesture, newest first, each with the language
mix it heard. Choosing one puts it back in the bubble. Clear history is at
the bottom. History lives in
~/Library/Application Support/PushSense/history.json, on your Mac only;
nothing is synced or uploaded.
Output mode
What happens to the transcript before it is typed.
- Raw (dictation only) (default): what you said, punctuated, nothing else.
- Smart (AI understands intent): hands the transcript text to your configured provider (Local Ollama, OpenAI, or Ollama Cloud) and applies your auto-fix rules before typing it. With Local Ollama nothing leaves the Mac. Audio always remains local. Failed AI requests fall back to the original transcript.
App language
App language switches every menu, window, and message between English and 中文. System (the default) follows your macOS language. The change applies immediately, including to an open tutorial or Smart mode window.
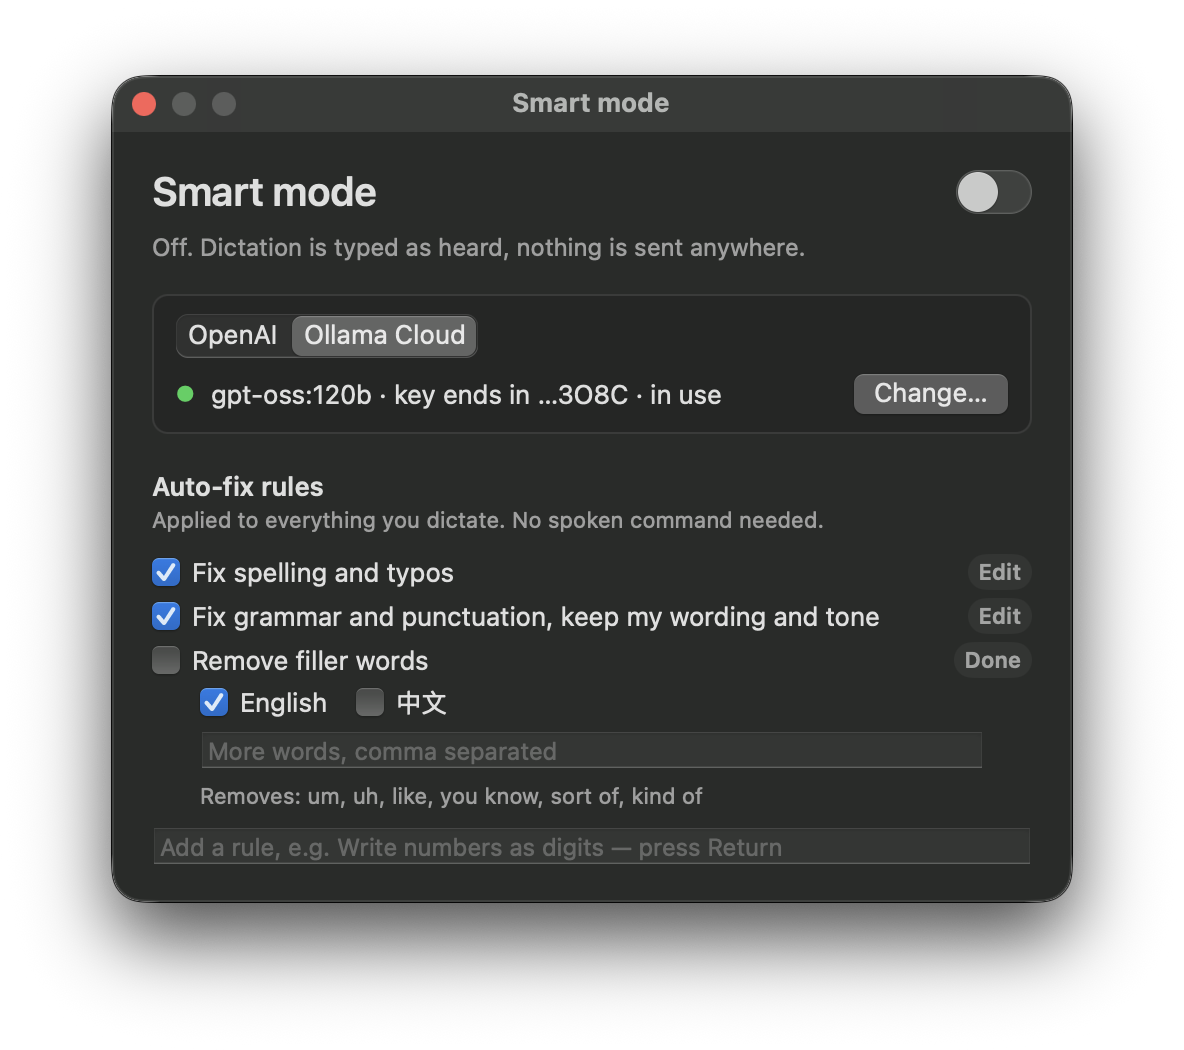
Smart mode settings
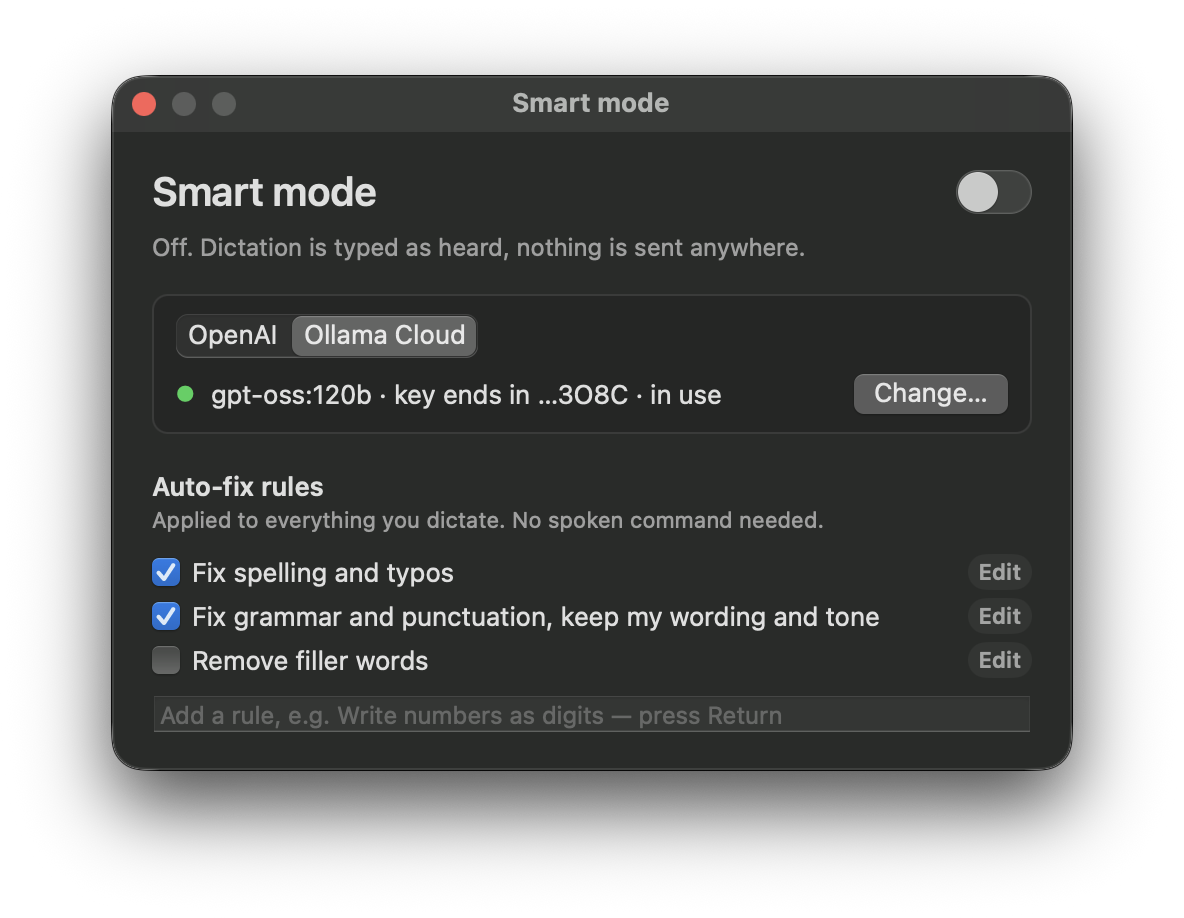
The window has three parts.
Smart mode switch at the top mirrors Output mode in the menu. It is greyed out until a provider is connected.
Provider card has an OpenAI | Ollama Cloud | Local Ollama tab row; the line under it shows that provider’s model, the last four characters of its saved key (cloud providers only), and whether it is the one in use. Picking a provider that is not set up opens its form; for one already set up, press Change….
- OpenAI and Ollama Cloud: paste a key, optionally change the model, and press Test & save. One tiny request is sent; if it succeeds the key is stored in macOS Keychain, the model is saved, that provider becomes active, and Smart mode turns on. Remove … key deletes that provider’s key; removing the active one turns Smart mode off.
- Local Ollama: needs the Ollama app
running with at least one model pulled (in Terminal, for example
ollama pull qwen2.5:7b, then press Refresh). Pick a model from the list and press Test & save. No key, no account, and the transcript never leaves the Mac. The model is loaded into memory while Smart mode is on and unloaded when it is off, so it costs nothing when unused.
Each provider keeps its own key and model, so you can set up several and switch by testing another one.
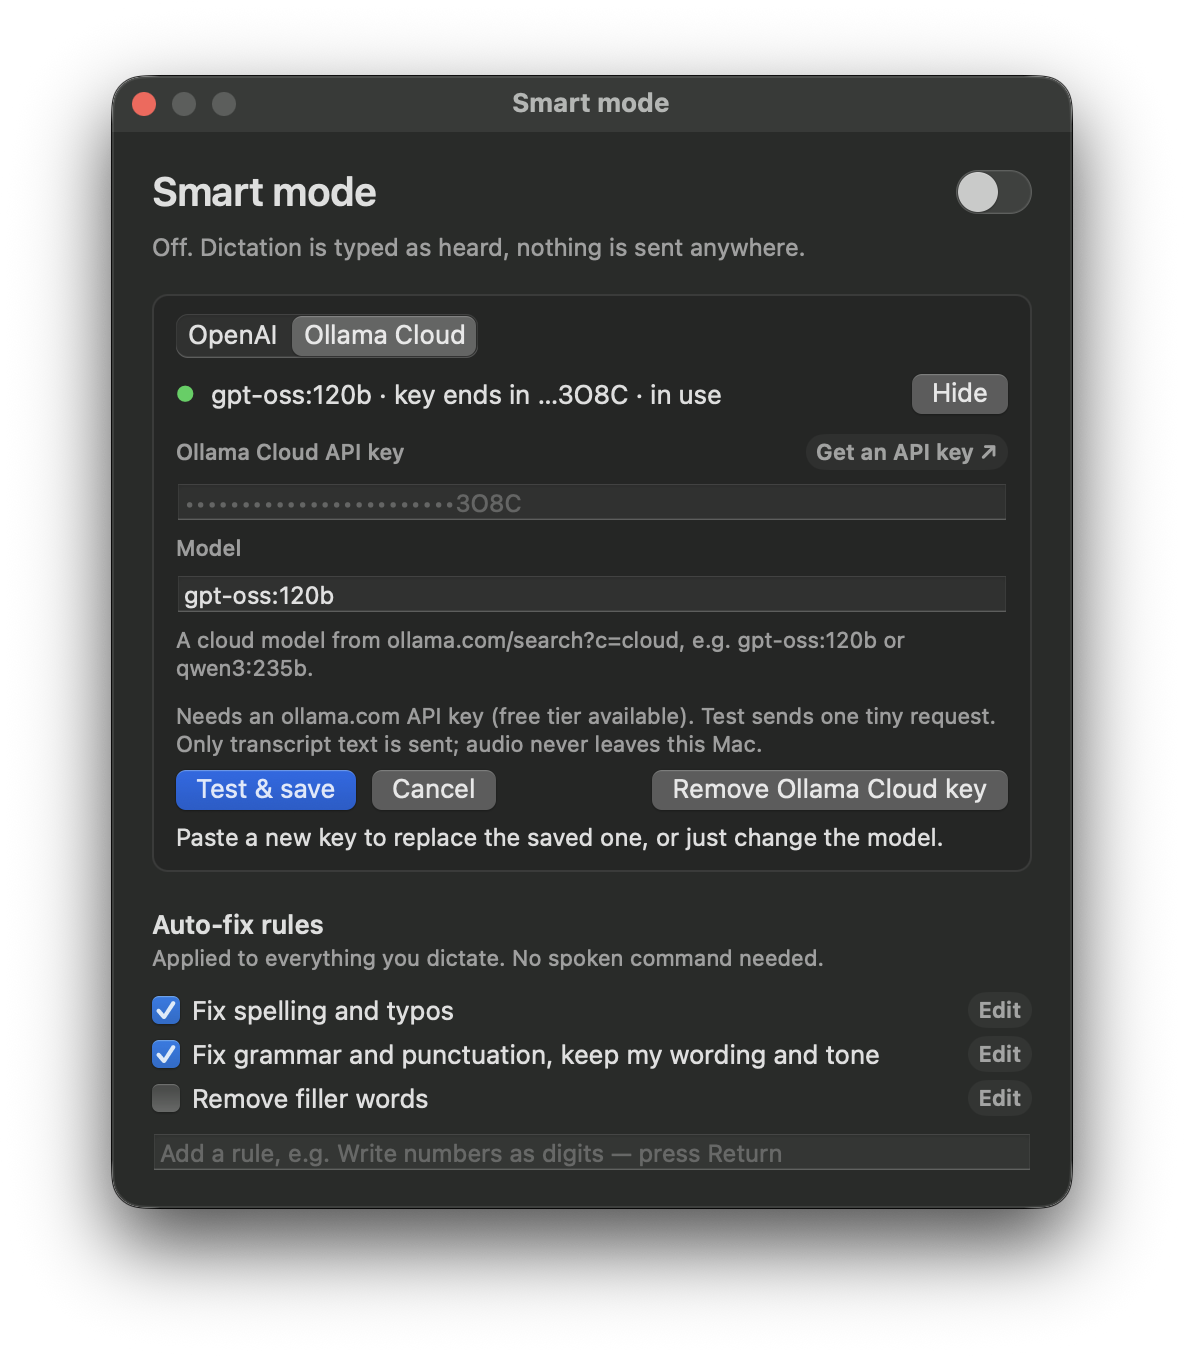
Auto-fix rules are applied to everything you dictate; you never need to say a command. Built-in rules cover spelling, grammar and punctuation, and filler words (off by default). Edit on the filler rule lets you pick language presets (English, 中文) and add your own words. Add a one-line rule of your own in the field at the bottom and press Return. Changes apply immediately.
Speech model
Which Whisper model does the transcription. Three are offered, all downloaded by the app on demand:
| Model | Size | When to use it |
|---|---|---|
| Base | 148 MB | Fastest, and audibly worse. Hears “customer support” as “custom support”. |
| Small (recommended) | 181 MB | Handles Chinese with English words mixed in. A whole sentence in each language works when you pause between them. A quarter of Turbo’s memory. |
| Large v3 Turbo | 547 MB | Best at switching languages mid-sentence without a pause, and more robust on hard audio. Costs about 700 MB of memory while running. |
You can download more than one and switch between them. Remove downloaded… frees the space for models you are not using.
The status line under this menu tells you whether a model is ready, or shows download progress with a Cancel download option.
Tutorial…
Reopens the first-run walkthrough. Useful if you skipped a permission.
Open config folder / Open model folder
Reveal the folders in Finder. Config holds your settings; the model folder
holds the downloaded Whisper files. Both are under
~/Library/Application Support/PushSense.
API keys live in the macOS Keychain, not in a plain file.
Check for Updates… / Check automatically
PushSense asks GitHub whether a newer release exists. If one is, the menu grows an ”⬆ PushSense x.y.z available…” line that opens the download page. Nothing is installed automatically.
Troubleshooting
It records but nothing is typed. Accessibility permission is missing. System Settings → Privacy & Security → Accessibility → turn PushSense on. If it is already on, turn it off and on again; macOS sometimes needs the toggle after an update.
The hotkey does nothing. Input Monitoring permission is missing. Same pane, one row up.
Text appears in the wrong app. PushSense types into whatever has keyboard focus at the moment you release the key. Click into the field first.
An app ignores the typed text. Switch Paste mode to clipboard.
Chinese comes out as Traditional. It should not; the app forces Simplified. If you see Traditional, open an issue with the sentence.
”⚠ No speech model”. The download did not finish. Open the Speech model submenu and pick one to start it again.
I dragged the text into a window and nothing happened. That window does not accept dropped text and also refused the click-and-paste fallback. Hover the bubble and use Paste into the focused app after clicking into the field, or Copy and paste by hand. Tell me which app it was; I keep a list.
The pearl is gone. It may be behind a full-screen app, or dragged off an external display you have since unplugged. Menu bar → Buddy output → Move the buddy back to the corner.
The buddy stops before I finish. Auto-stop ends a take after 1.5 s of silence. Either keep talking through the pauses, or switch Stop after silence off and end takes by clicking the pearl.
Bug reports and feature requests: issues on the releases repo.